What a watercolor pouring looks like

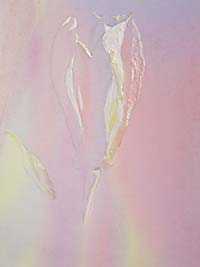
Here's a digital photo of the first-pour demo on a quarter-sheet of Arches 300 lb.cold press watercolor paper. The subject is a close-up of a shooting star wildflower that I took in my woods. The white and yellowish spots are the masking over the whites and the lighter areas that I added after the first pour. I used Da Vinci Rose Red Deep, Hansa Yellow Light and Cobalt Blue thinned with water to a very pale tint. I don't paint with Da Vinci paints, but they work for pouring. After masking the whites, I brushed clean water on the entire surface of the paper. I poured the colors onto wet paper and let them mingle, tipping the paper to direct the flow now and then. After the color had drained off the bottom corner of the paper, I blotted excess drips with a paper towel and laid the painting flat to dry. (It's important to let everything dry thoroughly between stages.) The three colors mixed randomly to produce greens and violets in some areas. I hope to have time to do some more pouring on Thursday. I can't wait much longer, because the masking may bond to the paper if I leave it on too long.
Labels: tutorials, watercolor techniques


2 Comments:
Beautiful soft colors that blend together visually like a sunset's afterglow.
You have a wonderful informative and visually beautiful blog here! You make me want to try waterolors again, even though I found them very frustrating!
Yes, watercolor can be frustrating at times, but oh! what a reward when everything works. Maybe you didn't give it long enough. It takes time, like learning to play a violin takes time. Please get those watercolors out and give it another chance!
Post a Comment
<< Home