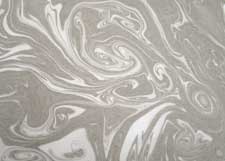
Trying something old for a change
 Artists are always looking for something new and creative to do. Why not try something old--like suminagashi? The subtle Japanese art of marbling has been around for hundreds of years but it seems to have been pushed into the background by fancy marbling having specific patterns and bright colors. One thing I like about suminagashi is that you can use plain water as the surface instead of having to mix wallpaper paste or carageenen. I decided to try this technique a couple of weeks ago. I followed directions in a book, but my attempt was a complete failure. I was so disappointed, but I was determined to make it work. The ink I was using kept sinking and the more I added, the more it sank. It was frustrating, because the book said you could use almost any kind of ink or paper, but nothing I tried would work.
 I found a couple more books in my library and some sites on the Internet that gave instructions, and I figured out what I was doing wrong. So I tried again. This time it worked. I found just one kind of ink that worked for me and one type of paper, so I didn't bother to experiment with materials. Instead, I played around with colors and subtle organic patterns.
Here are the materials I used: a plastic box 10" x 15" with 1 1/2" of water in it.
two oriental-style brushes with hair 1" long
Bombay India Ink, black and colors
Kodak Photo-Flo 200 dispersant (also called surfactant)
a small plastic palette with six wells
Put 1 teaspoon of ink in one well and 1 teaspoon of water in another. Add 1 drop of dispersant to the water and stir well. Load one brush with ink, the other with water. Then just barely touch the tip of the color brush to the water. A pale spot of ink will spread on the water. Touch the tip of the dispersant brush to it and it will force the ink into a ring. Touch again with the paint brush, and continue to alternate brushes until you're ready to make your print. Reload your brushes if necessary. Any disturbance to the surface--a toothpick pulled across it or a puff of air--will move the ink into patterns.
I used sumi-e paper, printing on the rough side. The paper should be smaller than your water container or it will catch on the sides and spoil the pattern. Hold the paper at diagonal corners and roll it onto the surface decisively from one corner to the other. After you lift the print, place it on a board or tray and rinse it in the sink with an indirect spray of water to remove excess ink. If you don't rinse, the excess ink will soak into the paper and make the print fuzzy. Lay prints on newspapers and paper towels to dry. (Set these up before you begin the process.)
You can skim the water with a strip of newspaper and make another print, but I got better results when I changed the water for each one.

The organic forms and delicate colors fascinate me. The patterns show up best when you lay the marbled papers on a white surface. I plan to use my marbled papers in collage and even to write letters on them.
Go to this link on the art of Japanese marbling, Suminagashi. Here's a site with more step-by-step instructions.
Have fun!
Labels: art mediums, art/craft, tutorials


2 Comments:
I just took a sumi-marbling class from Diane Mauer earlier this month. Isn't just fascinating how the water just flows and the paint moves so freely. I am hooked. Wonderful perfect description.
Rose M
Heh, I got very similar results from my experiments, but instead of Photo-Flo I used plain old dishwashing fluid... Any soap-like substance is a decent surfactant.
Post a Comment
<< Home